少し前に画像認識できるTensorFlowの学習済みモデルを探していると、https://github.com/tensorflow/modelsのofficialの下に、ImageNetデータセットで学習済みの、ResNetのPre-trained modelというのを見つけた。
ResNet以外のモデルやPre-trained modelがほとんど無いので、"official"といってもあまり注目されていないサイトなのかな、TensorFlow Hubがメインストリームなのかなと思いつつも、"official"なので信頼できそうだし、メンテナンスされているだろうからクオリティが高いだろう、難なく動かせるだろうと思って、とりあえず動かしてみようと思った。
しかし、TensorFlowのofficialなものなので、サンプルコードがすぐに見つかるだろうと思ったが、直接的なものを全く見つけることができなかった。その時点でこれは興味を持つ人が少ない、あまり良いものではないのだろうなと確信したが、何せTensorFlowのofficialなものなので、一応動かしておこうと思った。筆者は"official"という言葉に弱いのである。
しかし、TensorFlowの使い方をほとんど知らないまま、巷のサンプルコードをつぎはぎしながらでは予想以上に難しく、見ても何が悪いのかがわからない同じエラーメッセージを何時間も見続けて嫌になったが、それでもofficialなものを動かせなくては敗北と思って、さらに何時間も費やしてしまった。
最終的にはよくわからない所があるまま何らか動いたので、一応そのコードを記録する。
使用したモデルは、"ResNet in TensorFlow"のPre-trained modelの"ResNet-50 v2 (fp32, ...)"のSavedModelの所にある、"(NHWC)"と"(NHWC, JPG)"というリンクの先の、以下の2つのファイルである。
[1] resnet_v2_fp32_savedmodel_NHWC.tar.gz
[2] resnet_v2_fp32_savedmodel_NHWC_jpg.tar.gz
これらを、カレントディレクトリに展開したものとする。
すると、それぞれ
resnet_v2_fp32_savedmodel_NHWC/1538687283/
resnet_v2_fp32_savedmodel_NHWC_jpg/1538687457/
の下に、
saved_model.pb
variables/
が展開される。
それぞれ、saved_model_cliコマンドを使って、入力テンソルと出力テンソルの情報を表示してみる。
$ saved_model_cli show --dir resnet_v2_fp32_savedmodel_NHWC/1538687283/ --all
MetaGraphDef with tag-set: 'serve' contains the following SignatureDefs:

signature_def['predict']:
  The given SavedModel SignatureDef contains the following input(s):
    inputs['input'] tensor_info:
        dtype: DT_FLOAT
        shape: (64, 224, 224, 3)
        name: input_tensor:0
  The given SavedModel SignatureDef contains the following output(s):
    outputs['classes'] tensor_info:
        dtype: DT_INT64
        shape: (64)
        name: ArgMax:0
    outputs['probabilities'] tensor_info:
        dtype: DT_FLOAT
        shape: (64, 1001)
        name: softmax_tensor:0
  Method name is: tensorflow/serving/predict
$ saved_model_cli show --dir resnet_v2_fp32_savedmodel_NHWC_jpg/1538687457/ --all
MetaGraphDef with tag-set: 'serve' contains the following SignatureDefs:

signature_def['predict']:
  The given SavedModel SignatureDef contains the following input(s):
    inputs['image_bytes'] tensor_info:
        dtype: DT_STRING
        shape: (-1)
        name: input_tensor:0
  The given SavedModel SignatureDef contains the following output(s):
    outputs['classes'] tensor_info:
        dtype: DT_INT64
        shape: (-1)
        name: ArgMax:0
    outputs['probabilities'] tensor_info:
        dtype: DT_FLOAT
        shape: (-1, 1001)
        name: softmax_tensor:0
  Method name is: tensorflow/serving/predict
まず、tf.contrib.predictorを使って、"(NHWC, JPG)"[2]についてやってみた。
これは割と簡単に動いた。
import tensorflow as tf
from tensorflow.contrib import predictor

img_path = 'elephant.jpg'
with open(img_path, 'rb') as F:
    jpeg_bytes = F.read()

predict_fn = predictor.from_saved_model("./resnet_v2_fp32_savedmodel_NHWC_jpg/1538687457/")
result = predict_fn({'image_bytes': [jpeg_bytes]})

cls = result['classes'][0]
prob = result['probabilities'][0, cls]
print('class={} probability={:.3f}'.format(cls, prob))
class=386 probability=0.988
動作確認した環境は、macOS 10.13.6 + TensorFlow 1.13.1である。Raspberry Pi 2 v1.2(Cortex A53) + TensorFlow 1.13.1では、import行で後述のエラーが出て動かなかった。
コード中の'image_bytes'というのは、上記のsaved_model_cliの出力にある。
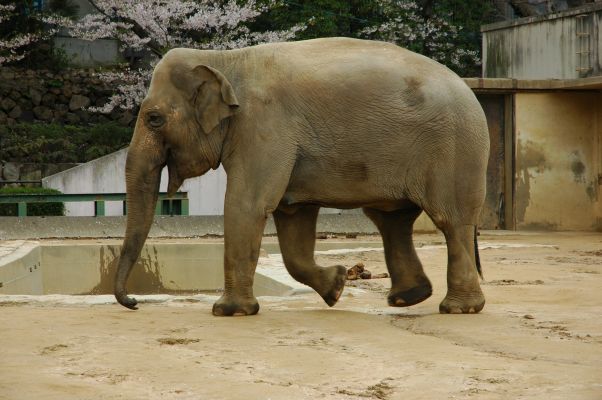
'elephant.jpg'はhttps://keras.io/ja/applications/の"Classify ImageNet classes with ResNet50"のコード例に合わせたものだが、officialなelephant.jpgが見つからなかったので、All-free-download.comの中から選んだ、次の画像を使った。

class=386は、別途調べた(後述)所では"Indian_elephant"なので、正解である。
次に、同じくtf.contrib.predictorを使って、"(NHWC)"[1]についてやってみた。
これはかなり苦労した。
import numpy as np
from PIL import Image
import tensorflow as tf
from tensorflow.contrib import predictor

img_path = 'elephant.jpg'
img = Image.open(img_path).resize((224,224))
x = np.array(img)
x = x.astype(np.float32)

predict_fn = predictor.from_saved_model("./resnet_v2_fp32_savedmodel_NHWC/1538687283/")
result = predict_fn({'input': np.array([x] * 64)})

cls = result['classes'][0]
prob = result['probabilities'][0, cls]
print('class={} probability={:.3f}'.format(cls, prob))
class=386 probability=0.821
上記のsaved_model_cliの出力にあるように、入力テンソルのshapeが(64, 224, 224, 3)なので、1枚の画像だけを認識したくても、必ず64枚分渡す必要がある(認識処理も64枚分まとめてなされる)のである。そのことになかなか気付かなかったので、同じエラーメッセージを嫌になるほど目にする羽目になってしまった。一体そういう仕様にすることにどういう意味があるのだろうか。これでは使い勝手が悪すぎる。
さらに、同じ形状のニューラルネットワークと同じ入力画像を使ってるのに、probabilityの値が"(NHWC, JPG)"[2]よりも悪くなっている。これについて少し調べたことを後述する。
次に、predictorを使わず、TensorFlow APIだけを使って、"(NHWC, JPG)"[2]についてやってみた。
●コード例3
import tensorflow as tf

img_path = 'elephant.jpg'
with open(img_path, 'rb') as F:
    jpeg_bytes = F.read()

with tf.Session(graph=tf.Graph()) as sess:
    tf.saved_model.loader.load(sess, [tf.saved_model.tag_constants.SERVING], "./resnet_v2_fp32_savedmodel_NHWC_jpg/1538687457/")
    class_tensor = sess.graph.get_tensor_by_name('ArgMax:0')
    prob_tensor = sess.graph.get_tensor_by_name('softmax_tensor:0')
    classes, probabilities = sess.run([class_tensor, prob_tensor], {'input_tensor:0': [jpeg_bytes]})

cls = classes[0]
prob = probabilities[0, cls]
print('class={} probability={:.3f}'.format(cls, prob))
class=386 probability=0.988
これはRaspberry Pi 2 v1.2 + TensorFlow 1.13.1でも動いた。
コード中の'ArgMax:0', 'softmax_tensor:0', 'input_tensor:0'は、上記のsaved_model_cliの出力から拾って試行錯誤して見つけた。
最後に、同じくpredictorを使わず、TensorFlow APIだけを使って、"(NHWC)"[1]についてやってみた。
●コード例4
import numpy as np
from PIL import Image
import tensorflow as tf

img_path = 'elephant.jpg'
img = Image.open(img_path).resize((224,224))
x = np.array(img)
x = x.astype(np.float32)

with tf.Session(graph=tf.Graph()) as sess:
    tf.saved_model.loader.load(sess, [tf.saved_model.tag_constants.SERVING], "./resnet_v2_fp32_savedmodel_NHWC/1538687283/")
    class_tensor = sess.graph.get_tensor_by_name('ArgMax:0')
    prob_tensor = sess.graph.get_tensor_by_name('softmax_tensor:0')
    classess, probabilities = sess.run([class_tensor, prob_tensor], {'input_tensor:0': np.array([x] * 64)})

cls = classes[0]
prob = probabilities[0, cls]
print('class={} probability={:.3f}'.format(cls, prob))
class=386 probability=0.821
●Raspberry Pi 2 v1.2(Cortex A53) + Python 2.7 + TensorFlow 1.13.1(pipでインストールしたもの)で"from tensorflow.contrib import predictor"すると出るエラーメッセージ
tensorflow.python.framework.errors_impl.InvalidArgumentError: Invalid name:
An op that loads optimization parameters into HBM for embedding. Must be
preceded by a ConfigureTPUEmbeddingHost op that sets up the correct
embedding table configuration. For example, this op is used to install
parameters that are loaded from a checkpoint before a training loop is
executed.

parameters: A tensor containing the initial embedding table parameters to use in embedding
lookups using the Adagrad optimization algorithm.
accumulators: A tensor containing the initial embedding table accumulators to use in embedding
lookups using the Adagrad optimization algorithm.
table_name: Name of this table; must match a name in the
  TPUEmbeddingConfiguration proto (overrides table_id).
num_shards: Number of shards into which the embedding tables are divided.
shard_id: Identifier of shard for this operation.
table_id: Index of this table in the EmbeddingLayerConfiguration proto
  (deprecated).
●ImageNetのクラス番号からクラス名を取得する方法について
ImageNetのクラス名のリストはどこから入手するのが正しいのかがわからない。
とりあえず、tensorflow.keras.applications.resnet50.decode_predictionsを呼び出すとダウンロードされるimagenet_class_index.jsonを見ればわかるようなので、これを使う、次のようなコードを作ってみた。
import pandas as pd
import os
class_index = pd.read_json(os.getenv('HOME') + '/.keras/models/imagenet_class_index.json')
def class_name(class_no):
    return class_index[class_no - 1][1]
>>> class_name(387)
'African_elephant'
●"(NHWC)"[1]と"(NHWC, JPG)"[2]とで結果が異なる件について
上記のコード例2とコード例4ではRGBにしたJPEG画像をリサイズしているだけだが、https://keras.io/ja/applications/の"Classify ImageNet classes with ResNet50"のコードではリサイズするだけでなく、keras.applications.resnet50.preprocess_inputを使って何らかの前処理をしている。これが原因かと思って同じようにしてみたが、probabilityの値は0.755と、さらに低くなってしまった。このpreprocess_inputの中身はソースコードを見てもわからなかったが、これを実行すると配列に負の値も現れるので、0~255を-255~+255の範囲で何らかの補正をしているようだ。色々試した所、0~255を-128〜127にオフセットすると改善したことがあったので、他の画像も使って、何通りか試してみた。
| +0 | -128 | preprocess | JPG | |||||
|---|---|---|---|---|---|---|---|---|
| class | probability | class | probability | class | probability | class | probability | |
| elephant1 | 386 | 0.821 | 386 | 0.944 | 386 | 0.755 | 386 | 0.988 |
| elephant2 | 387 | 0.756 | 387 | 0.535 | 102 | 0.487 | 387 | 0.501 |
| elephant3 | 268 | 0.529 | 102 | 0.596 | 102 | 0.928 | 387 | 0.902 |
"elephant1"〜"elephant3"は、All-free-download.comの中から選んだ、以下の画像である。
 elephant1
 elephant2
 elephant3
"+0"は上記のコード例2のもの、"-128"はコード例2の
x = x.astype(np.float32)
x = x.astype(np.float32) - 128
img = Image.open(img_path).resize((224,224))
x = np.array(img)
x = x.astype(np.float32)
img = image.load_img(img_path, target_size=(224,224))
x = image.img_to_array(img)
x = np.expand_dims(x, axis=0)
x = preprocess_input(x)
クラス名は
386: "Indian_elephant"
387: "African_elephant"
102: "tusker"
267: "standard_poodle"
であり、elephant1はインド象、elephant2とelephant3はアフリカ象なので、elephant1とelephant3については"JPG"が最善、elephant2については"+0"が最善である。elephant1については"+0"より"-128"の方が良いがelephant2については"-128"より"+0"の方が良く、elephant1とelephant2については"preprocess"より"+0"の方が良いが、elephant3については"+0"より"preprocess"の方が良いと思われるので、入力画像をどう前処理すべきかは一概に言えないように思う。
それにしても、入力画像がエンコードされたままのJPEGデータで画像認識が可能、しかもRGBにデコードされた2次元データを入力とするよりも精度が高い傾向がある結果になったのは驚いた。ConvolutionやPoolingにより抽出された特徴よりも、JPEGで使われるDCT等の符号化によって計算された特徴の方が画像認識に向くことがあるということだろうか。
そう言えば、正確な文脈を忘れたが、著作権や個人情報の取り扱いの問題がある場合に、暗号化されたデータをそのままディープラーニングの入力データにする方法があるというような話を聞いたことがある。全データに一律の符号化を行う限りは、入力データが符号化されていても問題ないということなのだろうか。
今回はTensorFlowの使い方を理解するのを目的に取り組んだが、結局、試行錯誤の末に動作に成功しただけで、コードの意味をきちんと把握できておらず、あまり勉強にならなかった。
TensorFlowの基礎を勉強してからやるんだったと後悔した。
Watanabe
This article saved my time becauase I had a trouble in
graph_def.ParseFromString(pbfile.read())
, which doesn't work on ResNet pretrained model.
Thank you so much. Keep going on it.